Step 3: Create New Page Properties
Creating custom page properties in Adobe Experience Manager (AEM) allows you to extend the functionality and manageability of your pages with additional metadata. This article guides you through the process of adding a custom tab with a new field to the Page Properties dialog of a specific component. The example provided focuses on adding a “Custom Properties” tab with an “Approved By” field to the page component located at /apps/wknd/components/page.
Step 1: Identify the Component
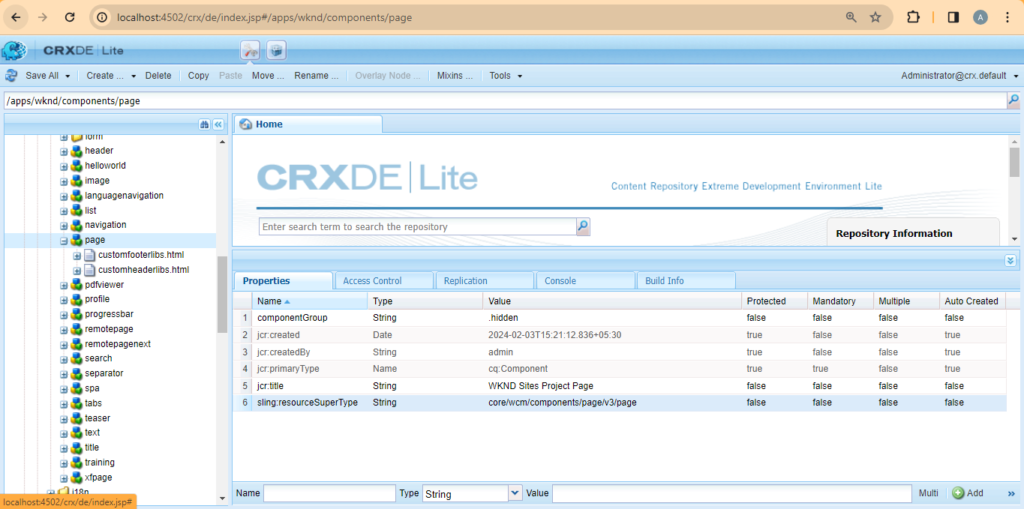
First, locate the component for which you want to add custom properties. In this example, we’re working with /apps/wknd/components/page. This is the component that will be modified to include the new custom properties.

Step 2: Check for cq:dialog
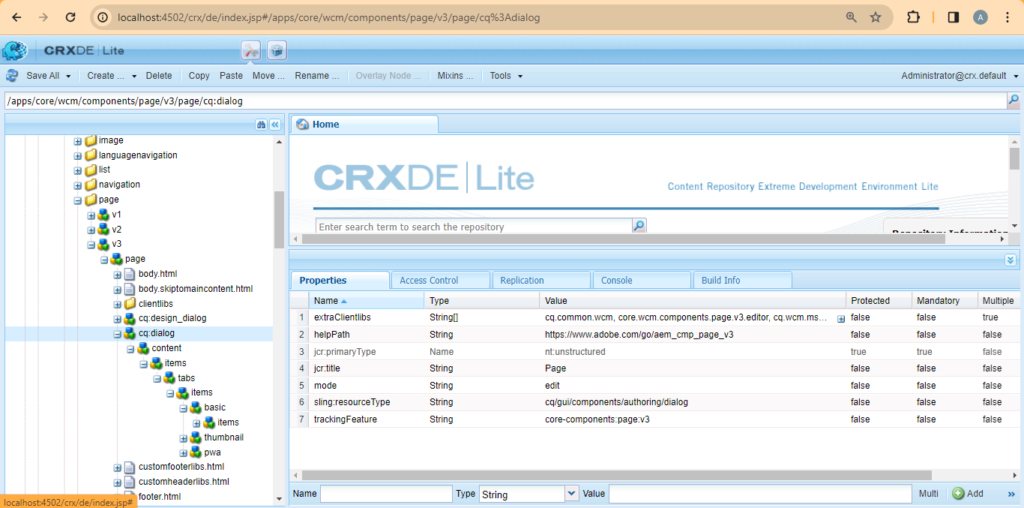
Navigate to the component’s node in CRX/DE and check if a cq:dialog node exists. If it doesn’t, you’ll need to inherit it from the component’s sling:resourceSuperType. For this example, the super type is /apps/core/wcm/components/page/v3/page, and you’ll find the cq:dialog at /apps/core/wcm/components/page/v3/page/cq:dialog.

Step 3: Override the cq:dialog
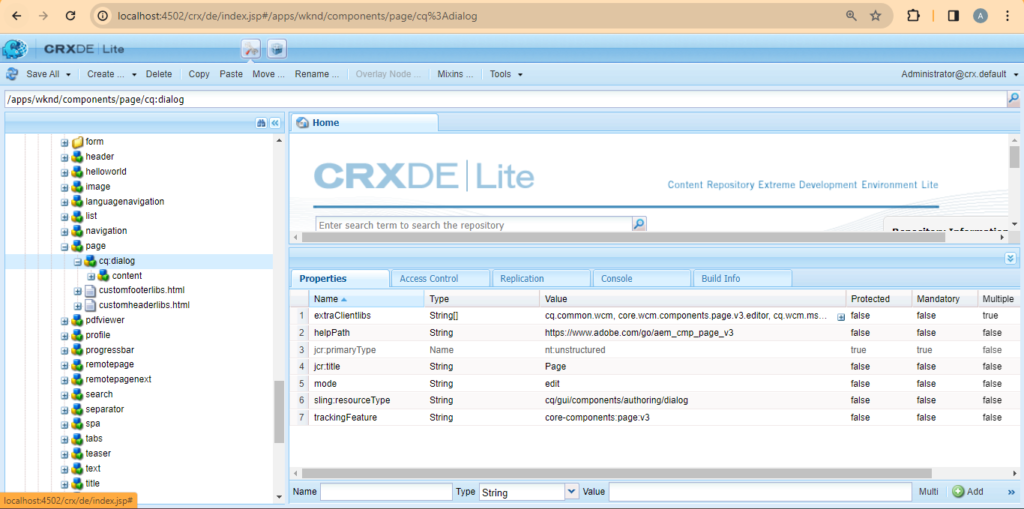
Copy the cq:dialog node from the super type (/apps/core/wcm/components/page/v3/page/cq:dialog) into your component’s node (/apps/wknd/components/page) to override the dialog functionality. This step allows you to customize the Page Properties dialog for your component.

Step 4: Save Changes
After each modification in CRX/DE, ensure you save your changes. This step is crucial to ensure that your modifications are stored and will be reflected in the AEM authoring environment.
Step 5: Create a New Tab
To add a new tab to the Page Properties dialog, copy an existing tab node from the cq:dialog structure. For this example, copy the basic tab from /apps/wknd/components/page/cq:dialog/content/items/tabs/items/basic.
Step 6: Save and Rename
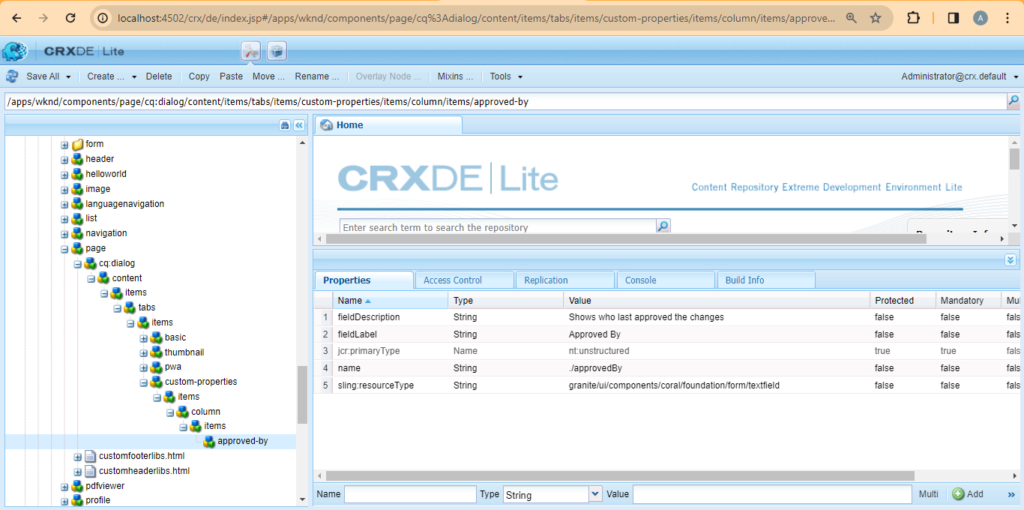
After copying the tab, save your changes and rename the copied node to custom-properties. This new node will serve as the container for your custom page properties.
Step 7: Change the Title
Update the title of the newly created tab to “Custom Properties”. This title is what will be displayed in the Page Properties dialog, making it easy for authors to identify the section where the custom properties are located.
Step 8: Add the “Approved By” Field
Under the custom-properties tab node, create a new node for your custom field. This field will capture the “Approved By” information. Ensure to configure the field correctly by setting properties such as name, fieldLabel, and fieldType according to your requirements.

Step 9: Validate the Changes
To check if your changes are correctly applied, open the Page Properties of a page that uses the modified component. For this example, navigate to /content/wknd/us/en in the AEM authoring environment and open the Page Properties dialog. You should see the new “Custom Properties” tab with the “Approved By” field present.
Conclusion
By following these steps, you have successfully added a custom tab with an “Approved By” field to the Page Properties dialog of your AEM component. This customization enhances the content management capabilities of your AEM site, allowing for more specific metadata to be associated with your pages. Remember, the ability to extend and customize page properties is a powerful feature of AEM that can be leveraged to meet various business requirements.
