Creating and Editing a Page in AEM
Navigating to the We.Retail Site in AEM
- Accessing the Site: Open your web browser and navigate to
http://localhost:4502/sites.html/content/we-retail/language-masters/en. This URL assumes you are running AEM locally and have the We.Retail sample content installed.
- Accessing the Site: Open your web browser and navigate to
- Authentication: If prompted, log in with your AEM credentials.
Creating a New Page
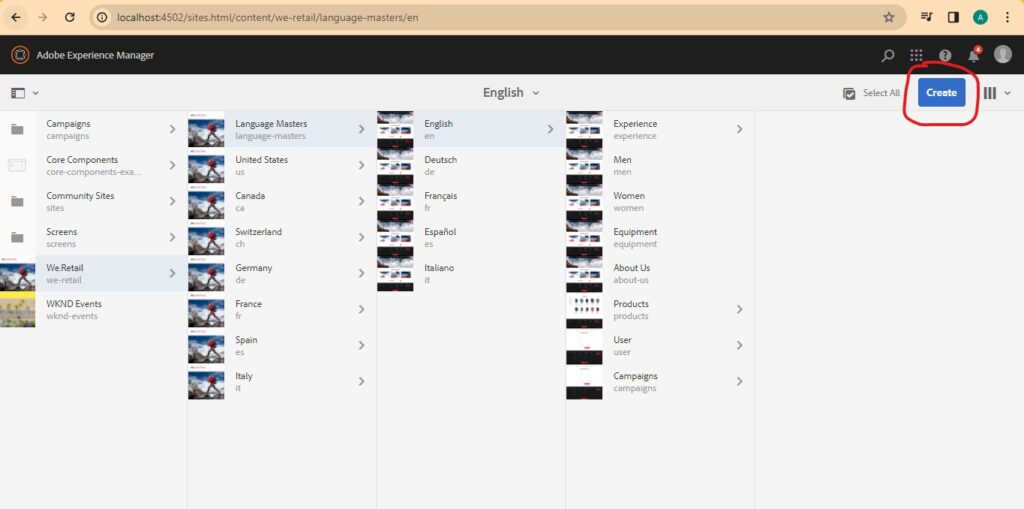
Open the Site: Once on the We.Retail site, you’ll see the existing site structure.
Create a New Page:
Select Create -> Create Page.
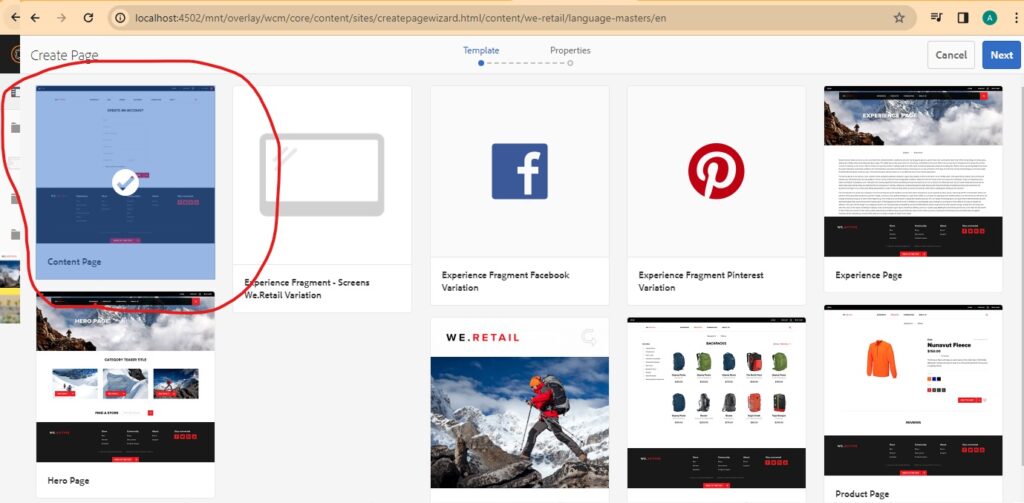
In the dialog box that appears, choose a template for your new page and click Next.
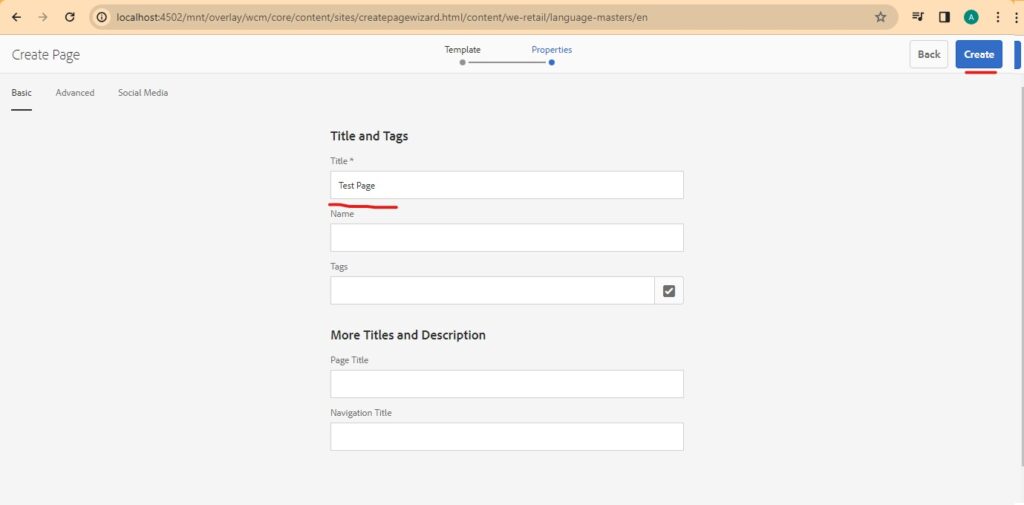
Enter the page name and title, then click Create.
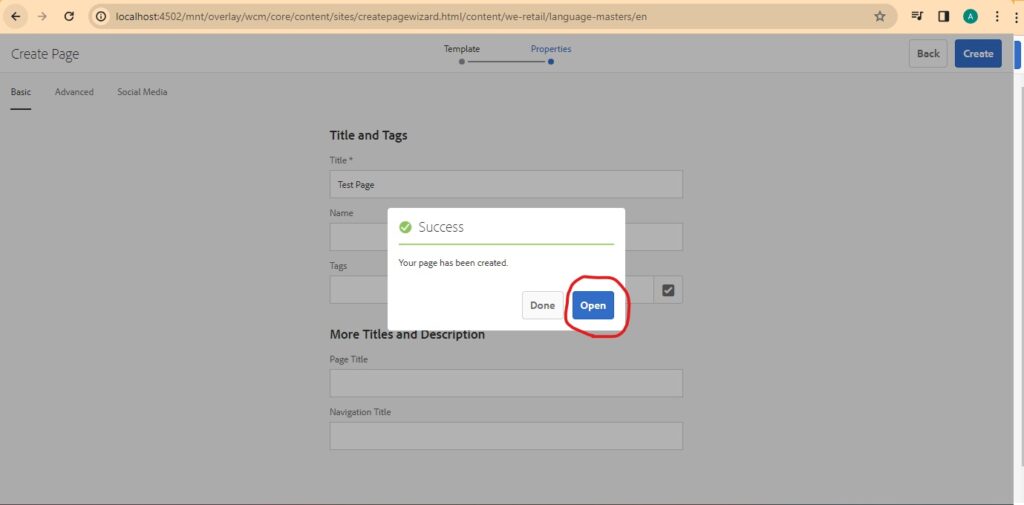
Click Open to view your new page.
Adding Components to the Page
Enter Edit Mode: If not already in edit mode, click the Edit button to start editing the page.
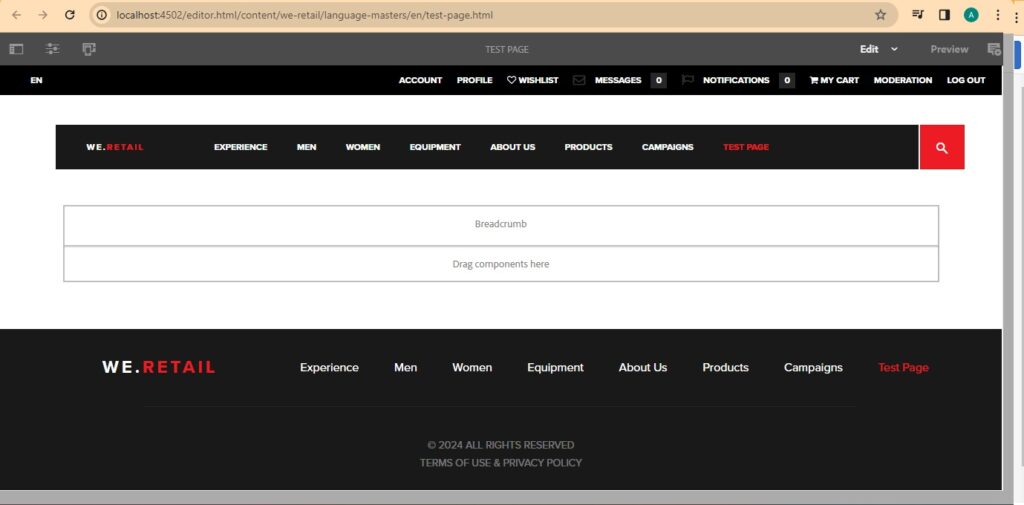
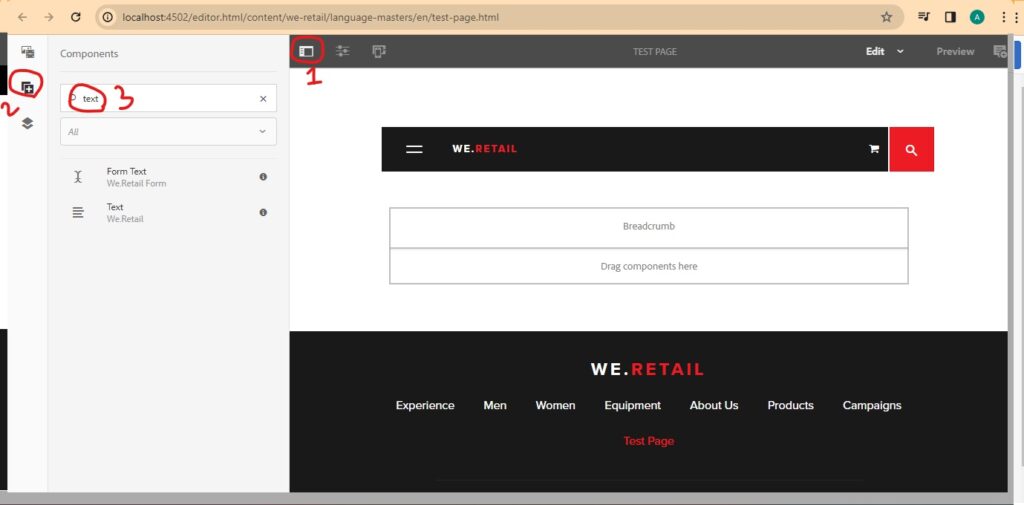
Adding Text Component:
Locate the Text component in the side panel under the Components tab.
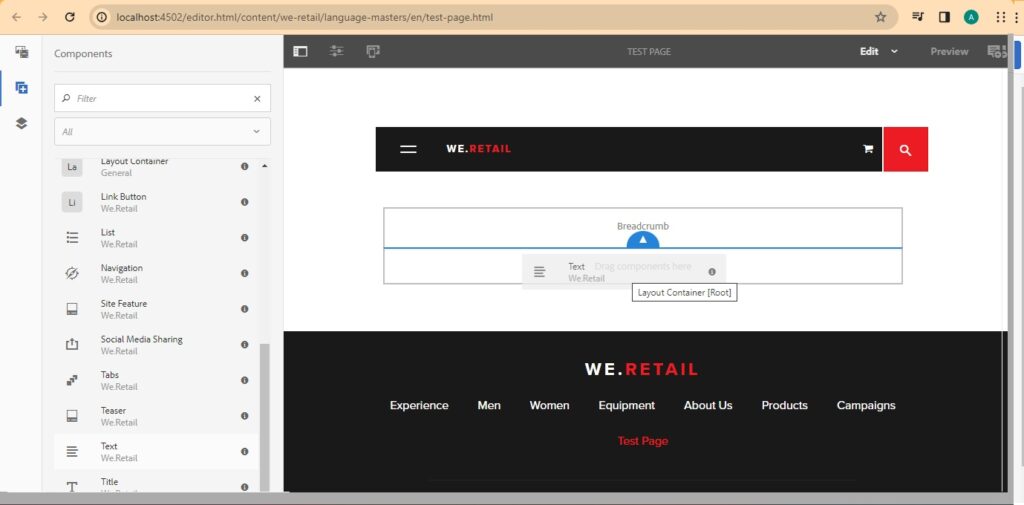
Drag and drop the Text component onto your page where indicated.
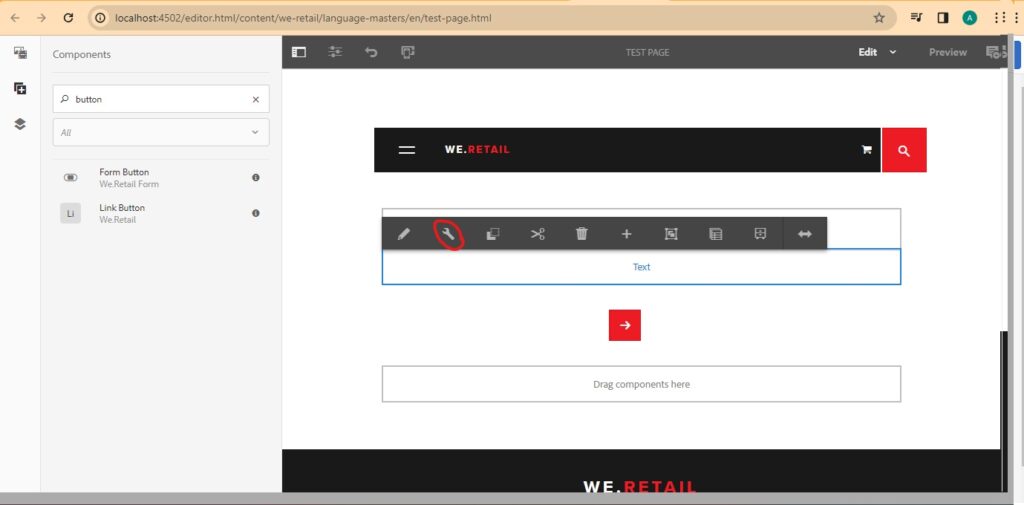
Adding Button Component:
- Similarly, find the
Buttoncomponent. - Drag and drop it onto your page.
Editing Components Using Dialog Boxes
Editing Text Component:
With the Text component selected, click on the Configure button (wrench icon) that appears in the toolbar.
A dialog box will open, allowing you to enter and format the text.
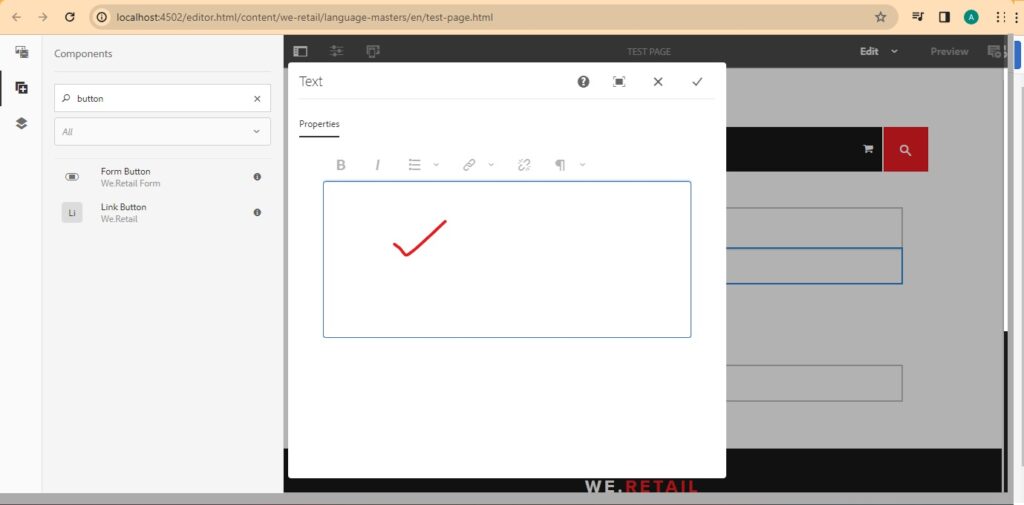
After making changes, click OK or Done to save.
Editing Button Component:
- Select the
Buttoncomponent and click on theConfigurebutton. - In the dialog box, set the button label, link, and other properties.
- Save your changes.
Navigating the Content Tree
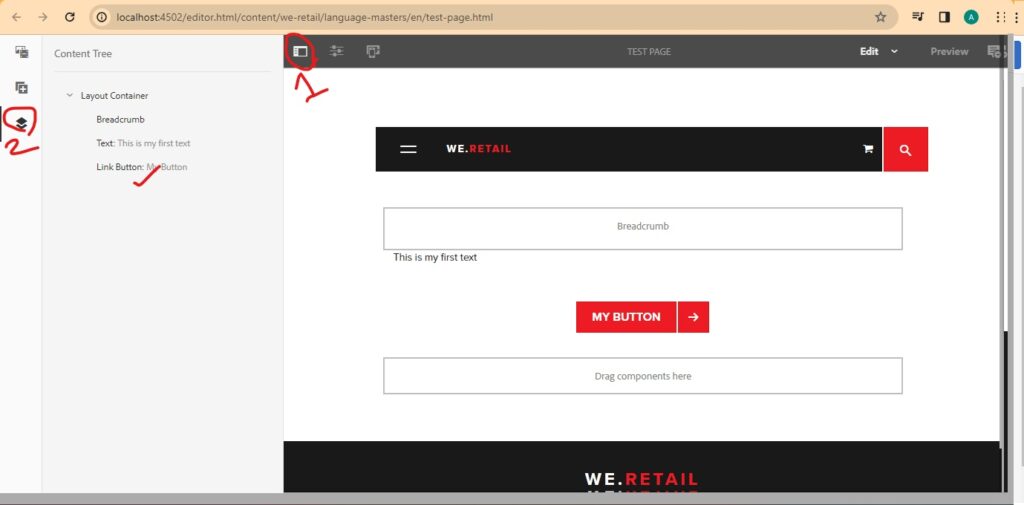
Open the Side Panel: Click on the left side panel button to expand it.
Viewing the Content Tree:
Click on the Content Tree tab in the side panel. Here, you can see a hierarchical view of all the components on your page.
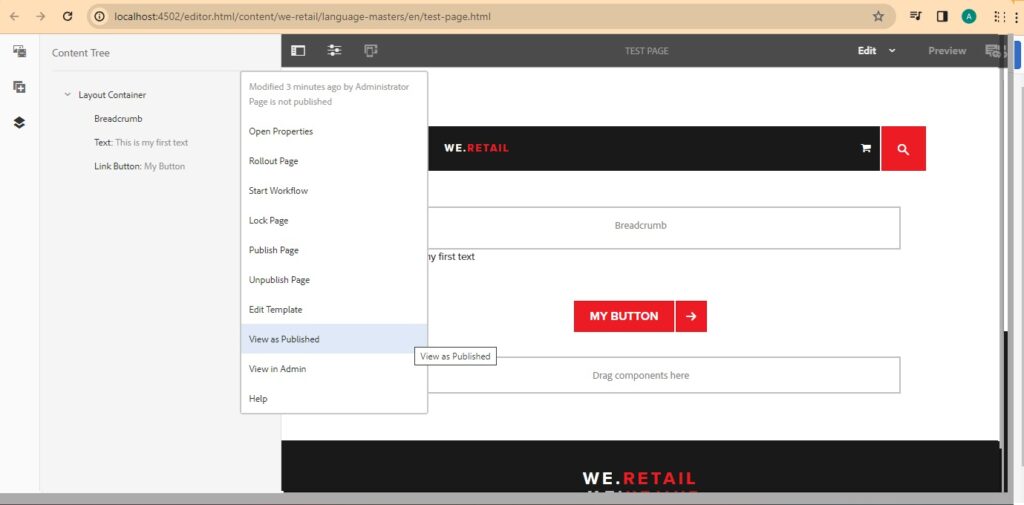
Click on the “Page Information” tab (Slider icon on the top) and click on the menu item “View as Published” to see the page as the end user would see it after publishing
Conclusion
In AEM, each page is composed of multiple units called components. This modular approach allows for great flexibility and ease in creating rich, dynamic web pages. By following these steps,
you can effectively navigate within AEM, create new pages, add various components, and modify them using dialog boxes. The content tree in the side panel provides a clear overview of the page structure, making it easy to understand and manage the components that form the page.
- Using the Content Tree:
- Within the content tree, each component on your page is listed.
- You can select any component from here to highlight it on the page.
- This view is particularly useful for understanding the layout and hierarchy of your page content.
- Modifying Page Structure:
- The content tree also allows you to reorder components by dragging and dropping them within the tree.
- This reordering is reflected in real-time on the page.
Best Practices for Working with AEM Components
- Consistency: Try to maintain a consistent look and feel across your pages by using similar components and styles.
- Component Customization: Make full use of the dialog boxes to customize each component to fit the specific needs of your content.
- Preview and Testing: Regularly preview your page as you build it, ensuring that it looks and functions as expected on various devices.
Final Thoughts
Adobe Experience Manager’s powerful and flexible system allows for intricate web page designs through a composition of components. Each component can be individually configured and positioned, contributing to the overall functionality and aesthetics of the page. Understanding how to navigate AEM, create pages, add and configure components, and utilize the content tree is essential for any AEM developer or content manager. With these skills, you can effectively build and manage engaging, responsive websites that meet the diverse needs of your audience.
